
VidFomo
Loading...

Gemini Omni 1.2 Flash Video Generator

Mode
0/10000
Aspect ratio
Duration
3s
Resolution
Required Credits
21

Sample Videos

0:00 / 0:00

Gemini Omni 1.2 Flash AI Video Generator

Use Gemini Omni 1.2 Flash on VidFomo to make the shot your edit needs. Start with a written brief, carry details from photos into a new scene, or connect two compositions. Set the runtime and review the generated picture and sound together.

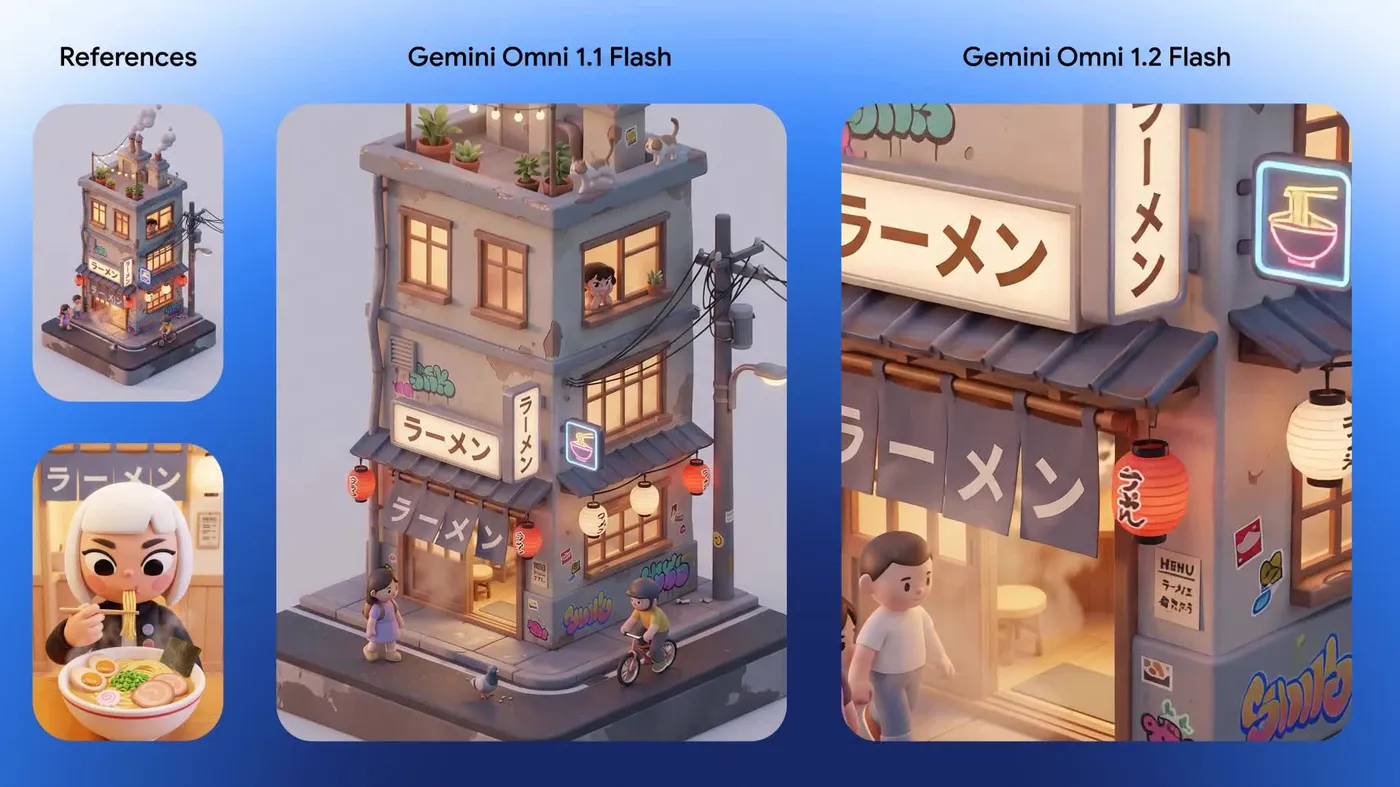
Gemini Omni 1.2 Flash launch graphic from Google with scenes of a beehive, animated animals, a city street and an octopus.

Explore Other Video Generators

Browse the model collection when your next shot calls for different inputs, framing or a longer take.

Make an Edit-Ready Clip with Gemini Omni 1.2 Flash

Plan how the shot opens, what changes, and where the action settles.

  1. Choose What Defines the Shot

    Pick Text to Video when the scene starts with an idea. Pick Frames to Video when you already know the opening composition, and add an end frame if the final composition is set. Pick Reference to Video when up to six images should inform a new scene. Use either frame inputs or references for a single shot. On VidFomo, text, one opening frame and references allow 3 to 15 seconds in whole-second steps. With both frames, choose 3 to 10 seconds.

  2. Give the Camera and Sound Their Own Direction

    Name the subject, one camera move and one action the viewer can track. Tie a sound to that action, such as a zipper closing as a bag leaves the frame. Then set the actual runtime and aspect ratio in the controls.

  3. Review the Take Before You Cut It In

    Sign in, check the credits shown with Generate, and run the shot. Watch the cut points at normal speed, then listen without looking to catch loud or mistimed sounds. Change one part of the brief at a time and download the take that fits.

Three Shot Briefs You Can Paste into the Generator

Copy a prompt, apply its settings, then use the review cue to check the result.

Give a Process Its Own Rhythm

A process insert needs time for the change to read. Try a 15-second shot of coffee brewing in a glass dripper. At the end, check whether there is room for a graphic or a cut to the next shot.Text to Video · 15 s · 16:9 · 720pOne continuous close-up of a glass coffee dripper on a wooden counter in early morning light. Begin on the dry coffee grounds. A thin stream of water enters from the upper right and the grounds gently bloom. Track down the side of the dripper until the first drops fall into the glass server. Hold on the last drop and the rising steam. Include soft pouring and room tone, with no music or lettering.

Make a Process Shot

Turn Location References into a Camera Move

Pick one photo for a gallery entrance and one for its interior. Describe the path through them in the prompt. Check whether the doorway reads clearly and the interior retains the material and color you wanted.Reference to Video · 12 s · 16:9 · 720p · 2 reference imagesUse image one for the frosted glass entrance of a small gallery and image two for the pale oak floor and rust-colored wall inside. Start one step outside the doorway. Glide forward at walking pace and turn slightly toward the rust wall as you cross the threshold. Keep the entrance proportions and the floor grain recognizable. Add quiet footfalls and a gentle indoor echo. End with the wall centered and the camera still.

Create a Shot from References

End on a Composition You Already Have

Start with a photo of a closed miniature greenhouse and end with its doors open. Match the lens angle, table edge and greenhouse position. On playback, check the hinge motion and compare the ending with your supplied frame.Frames to Video · 8 s · 16:9 · 720p · first and last frameA fixed low camera looks straight at a miniature greenhouse on a slate tabletop. Begin with the glass doors closed as shown in the first frame. Both doors open slowly from the center to reveal a row of tiny plants in warm light. Keep the greenhouse and table edge fixed. Let the faint hinge clicks end before a final hold on the open doorway, matching the last frame.

Connect Two Frames

Set the Clip Up for Delivery

Choose the output around what the viewer needs to read, hear or follow in the finished edit.

Decide Where the Eye Should Go

Pick 16:9 to follow motion across a room or keep two people visible. Pick 9:16 when you want one subject to fill a phone screen. If the edit will add captions or a price, describe where to leave open space. A product that stays near the middle may also give you a more usable crop later.

Find a Clean Frame to Cut On

Output runs at 24 frames per second. Watch a take at normal speed first, then scrub near the edit point. A cut on action works when the viewer can follow the same motion into the next shot. If you want to cut after a reveal, ask the camera and subject to settle before the clip ends.

Judge Motion Before Fine Detail

Choose 360p to check broad motion and blocking, or 720p when labels, edges and facial details matter to the decision. The 1080p and 4K options upscale the generated video. Compare a higher-resolution generation as a new take and check the framing and small details again before you use it.

Leave Space in the Soundtrack

Gemini Omni generates sound with the picture. In a quiet gallery shot, a single pair of footsteps can tell the viewer more than a crowded mix. For speech, name the speaker, write the exact words in quotation marks, and reserve time for the line. After download, you can mute the track or mix it under other audio in your editor.

Creator Experiences with Gemini Omni 1.2 Flash

  • Consistent Details Across the Shot

    I used Gemini Omni 1.2 Flash to create a short product video featuring a skincare bottle on a rotating display. I was particularly interested in how the packaging details, reflections, and camera movement worked together. The visual consistency gave our team a useful starting point for discussing the final campaign direction.
    Emily RichardsonProduct Marketing Designer
  • A More Natural Way to Create Videos

    For a travel content idea, I started with a reference image of a coastal landscape and described a slow cinematic camera movement. I liked being able to guide the scene through a simple written prompt. Seeing the landscape come to life helped me decide which visual direction was worth developing further.
    Daniel FosterTravel Content Creator
  • Useful for Short Social Campaigns

    Our team needed a vertical video concept for a small fashion brand's Instagram campaign. I used Gemini Omni 1.2 Flash to explore a 15-second scene featuring a model walking through an urban setting. The clip helped us evaluate the movement, atmosphere, and pacing before planning our actual promotional content.
    Sophia BennettSocial Media Marketing Specialist
  • Refining Clips Without Starting Over

    I was developing a short cinematic scene set inside a coffee shop, but the original lighting felt too bright. I used a follow-up instruction to request warmer tones and a more relaxed atmosphere. Being able to refine the existing video through conversation made the creative process feel more flexible and focused.
    Marcus ChenIndependent Filmmaker
  • A Practical Video Creation Workflow

    While preparing a presentation for a client, I needed to visualize a short brand storytelling sequence. I generated an initial clip, reviewed the camera movement and timing, and adjusted the scene description where needed. The process helped me communicate a moving visual concept more clearly than a collection of static reference images.
    Rachel MorganCreative Content Strategist
  • More Creative Options in Less Time

    I frequently need to explore different video concepts before clients approve a production direction. Gemini Omni 1.2 Flash helped me experiment with camera angles, environments, and visual styles without building each scene manually. Having those early video references made feedback discussions more productive and helped me focus my production time on promising ideas.
    Alex RiveraFreelance Video Producer

Gemini Omni 1.2 Flash Questions for Your Next Cut

Find out how the input, version and settings affect the clip you can make in VidFomo.

Choose 1.2 on VidFomo for an in-between duration such as 7 or 11 seconds. Version 1.1 offers 4, 6, 8 and 10 seconds. For a shot that needs seven image references, choose 1.1. Version 1.2 accepts up to six.

Use Frames to Video when you can point to exactly where the subject should be on the first and last frame. Use Reference to Video when the pictures supply elements such as a jacket and a location, and you want the model to compose the shot. Two images can serve either job. Choose based on how much of the composition you want to specify.

Build Your Next Shot in VidFomo

Set up a shot from a prompt, two frames or reference images, then generate it for your next edit.